How To Do Lazy Daisy Stitch
- Sara | Pixels & Purls

- Sep 24, 2020
- 1 min read
Ah lazy daisy, the perfect way to make sweet little flowers! These can take a little practice to get them flush and neat. If you're finding they're not sitting pretty, try pulling your thread through slower and slacker, widening your starting stitch and taking your time.
Here's how ya do it:


Bring needle up at point A, pull the thread all the way to the front and re-insert in the same spot (photo one).
Pull the thread to the back, leaving a loop (photo two).
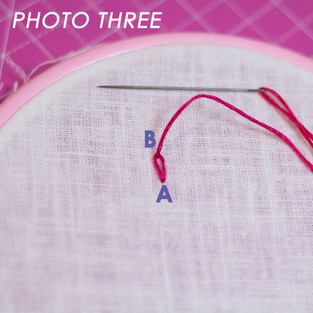
Bring the needle up at point B, catching it through the loop, and pull it all the way through to front (photo three) - be careful not to pull too tight or you will ruin the shape of the “leaf”.


Insert your needle just above point B, so the stitch you’re making encases the top of the loop (photo four).
Pull thread all the way to the back and you’ve made a lazy daisy stitch.
These can either be used on their own (called a detached lazy daisy), or in a pair to make leaves that are good for borders (photo five), or by making many of them in a circle to form a flower (photo six). Fora flower or leaves, start each lazy daisy from the same central point.


Comments